How to Download Trust.Zone for Windows and Use It
1. Choose Your Plan and Price
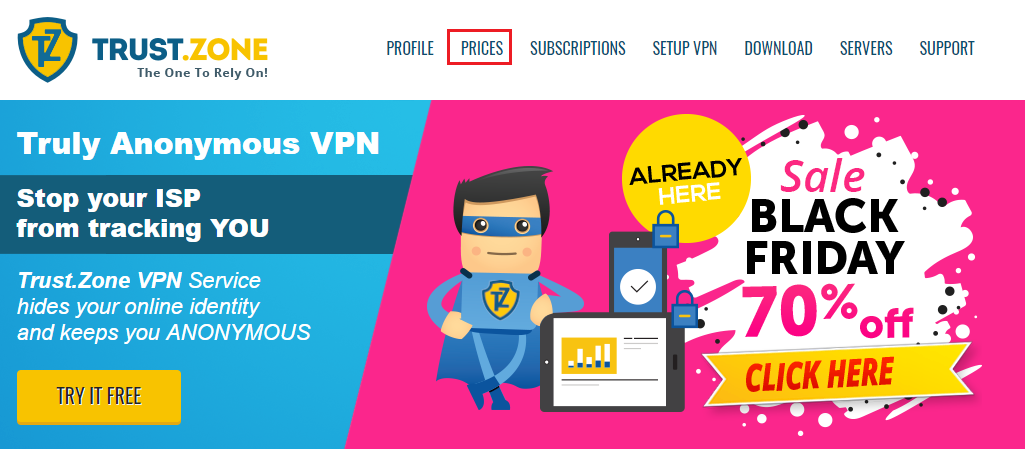
To get started, head over to the Trust.Zone website and click on Prices.
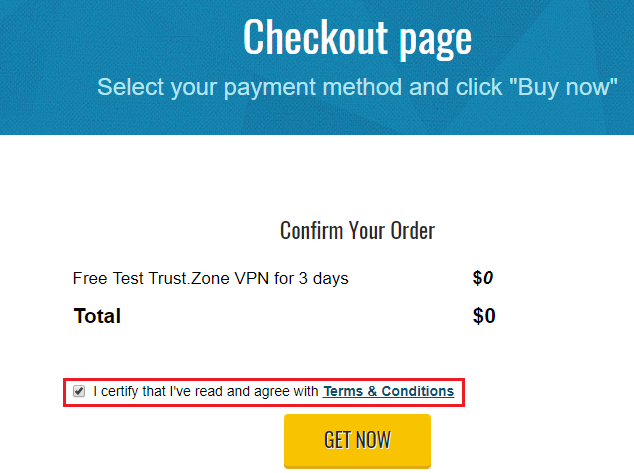
On the page with the subscription plans, choose the free test plan that is good for three days. The paid plans have a 10-day money-back guarantee, and the 1-year plan offers the best value for your money.
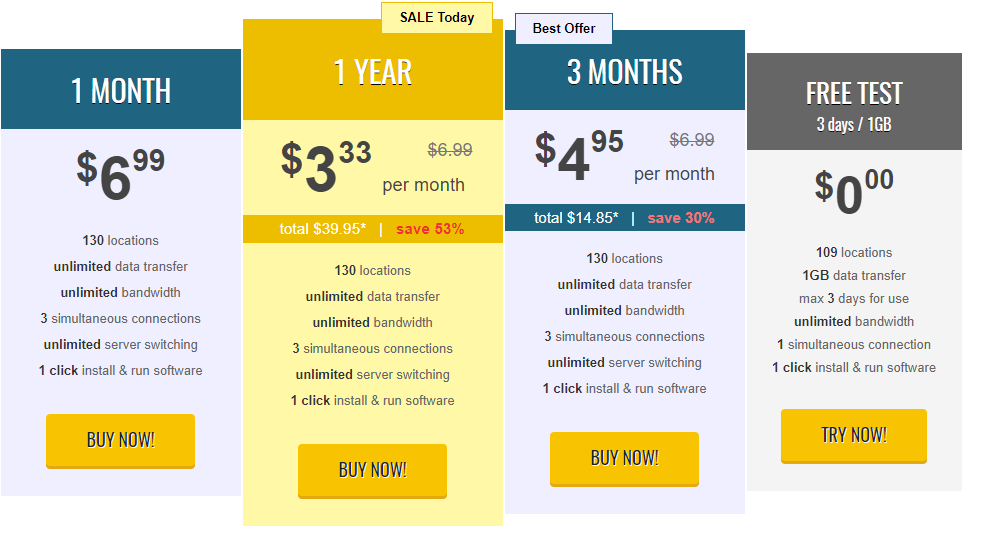
Click the Buy Now button on any of the plans to check out. Check that you have read the terms and conditions and then click Get Now.
2. Set Up a Trust.Zone Account
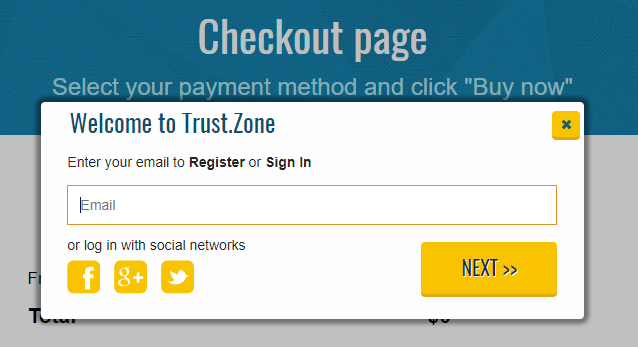
Next, register for a Trust.Zone account by providing your email address and then click Next.
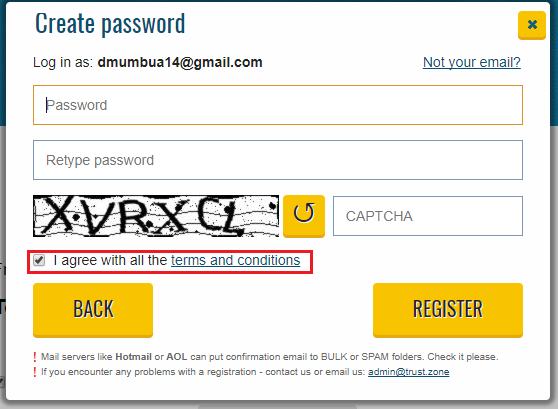
Create a password and complete the CAPTCHA test to prove that you are human. Agree to the terms and conditions and click Register to complete the account registration process.
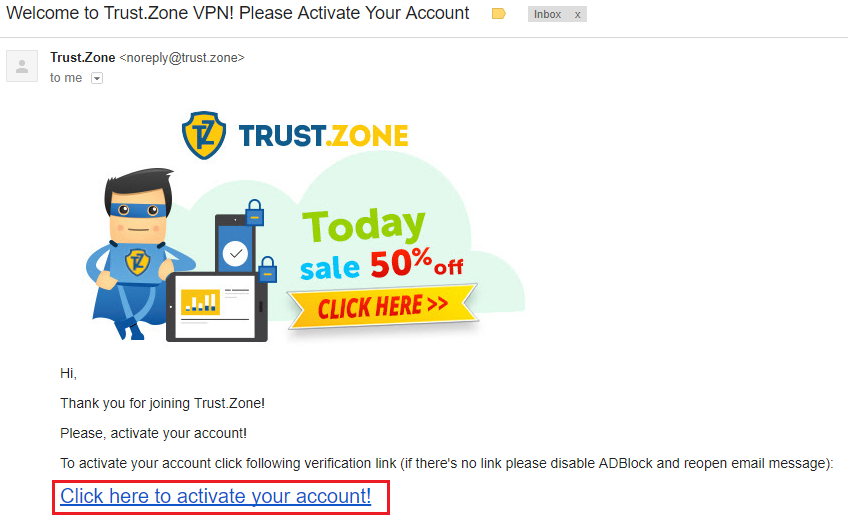
Click the activation link provided in your confirmation email to start using your subscription.
3. Download Trust.Zone
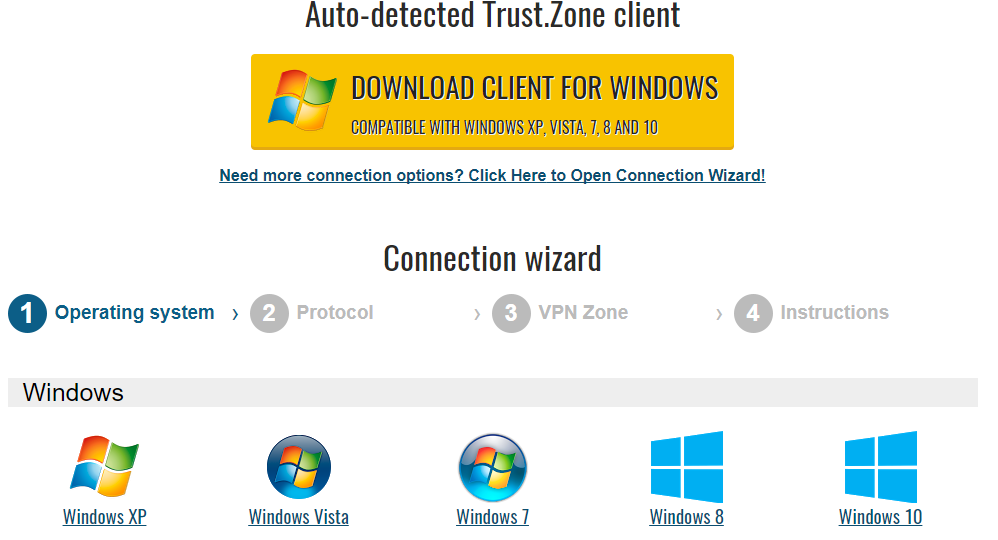
Once you activate your account, you will be directed to the Trust.Zone website to start the installation process. The first step entails choosing your operating system (OS), which in our case is Windows 10.
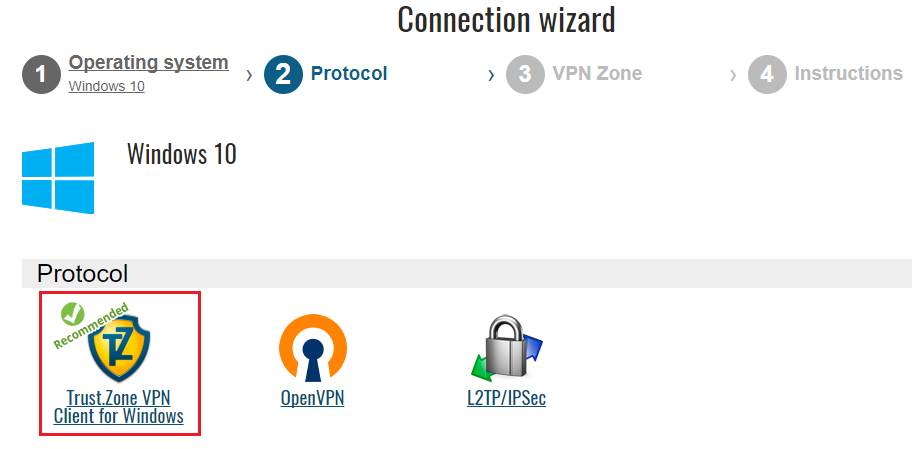
Following that, choose the protocol that best suits your preferences. Trust.Zone provides its own dedicated VPN client for Windows, enabling you to establish a connection. Alternatively, you have the option to connect using OpenVPN or L2TP/IPSec, although it's important to note that the latter protocol is only compatible with certain mobile platforms.
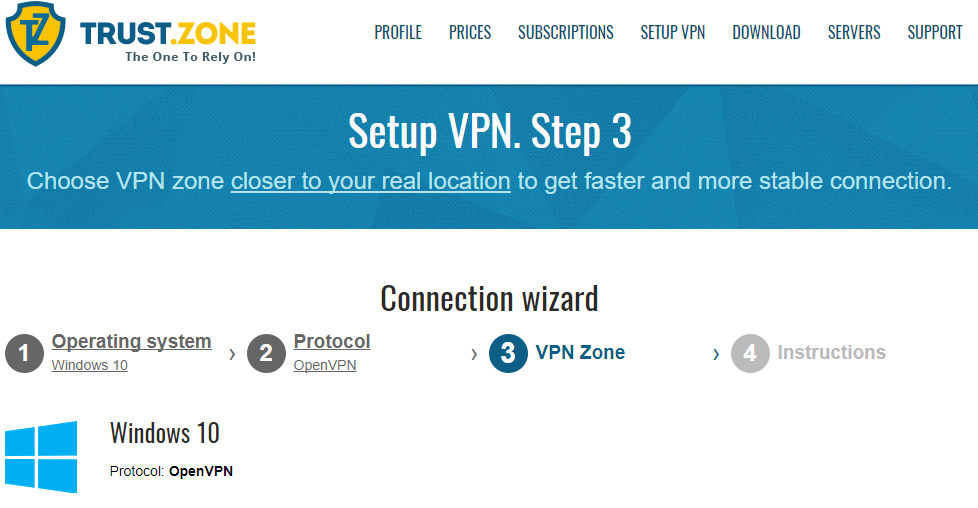
Choose a VPN Zone that is closest to your real location. There are many zones from which to choose, including Africa, Asia, Europe, North America, Oceania, and South America.
4. Install Trust.Zone
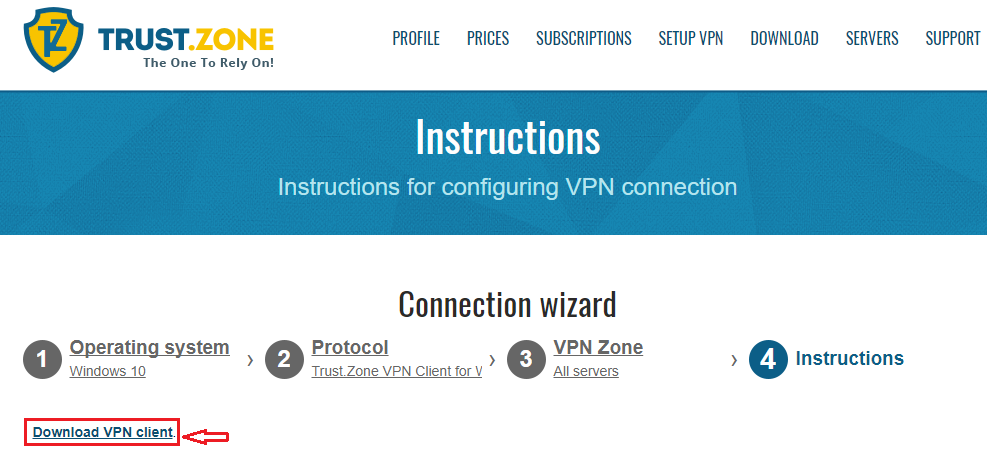
Download the Trust.Zone VPN Windows client by clicking on the link provided.
On your computer’s Downloads directory, right click on the downloaded Trust.ZoneVPN file and then click Run as Administrator to begin the installation process.
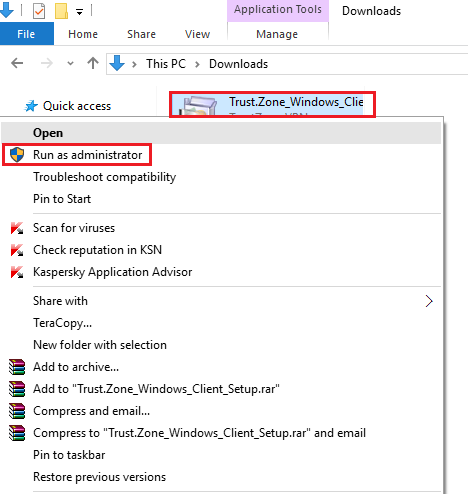
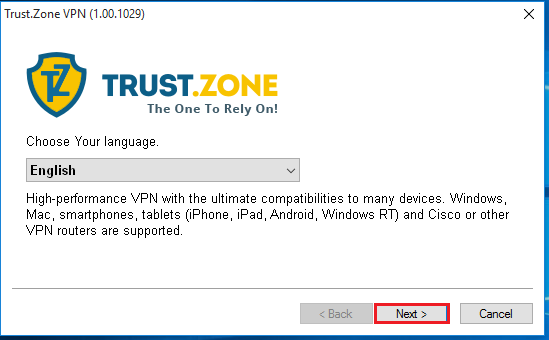
Allow the app to make changes to your computer and to launch the Setup Wizard. Choose your language and click Next.
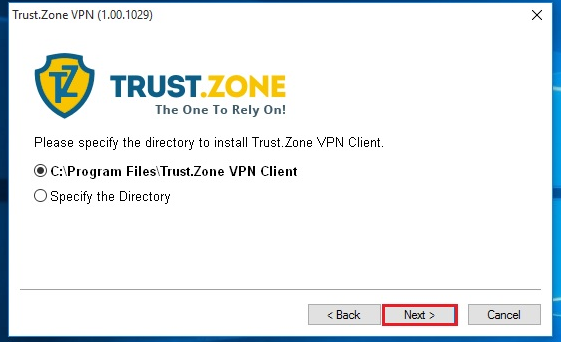
If you want to install the VPN in the default Program Files location, click Next. You may click Specify the Directory to choose an alternative location for installation; then click Next.
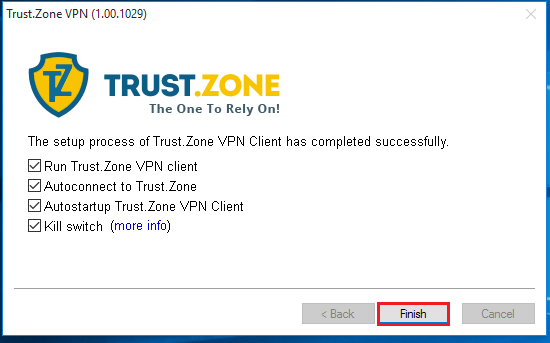
Once the set-up process is complete, click Finish.
5. Configure Trust.Zone
Click on Server on the lower left of the Trust.Zone client window to launch a list of available servers.
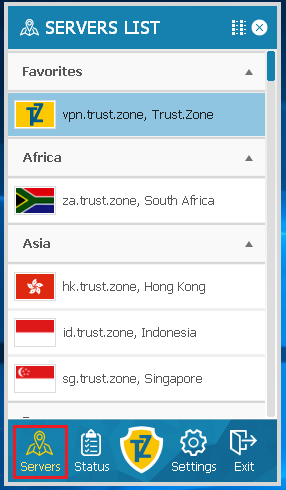
Select your preferred server location and click on it to connect. In this case, we’ve chosen to connect to a server in the United States.
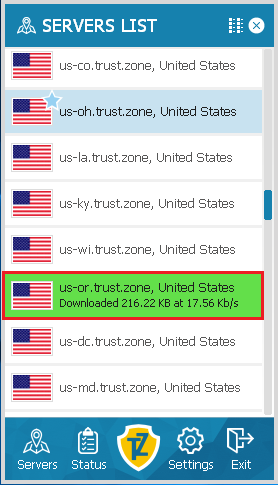
Your internet connection is now protected, and you can surf the net safely and anonymously!
Reasons to Choose Trust.Zone as Your VPN
- It’s affordable.
- You can connect up to three devices simultaneously
- You can safely stream your favorite shows and share P2P files
- You can try it for free for up to three days before committing to a paid plan
Trust.Zone is definitely making a splash in the VPN market, so if you're looking for an affordable VPN that comes with all the bells and whistles of a premium one, Trust.Zone is a terrific option.
To read more about Trust.Zone, click here.
We'd love to hear your thoughts on Trust.Zone, please take a minute and leave a review here.
Your data is exposed to the websites you visit!
Your IP Address:
Your Location:
Your Internet Provider:
The information above can be used to track you, target you for ads, and monitor what you do online.
VPNs can help you hide this information from websites so that you are protected at all times. We recommend ExpressVPN — the #1 VPN out of over 350 providers we've tested. It has military-grade encryption and privacy features that will ensure your digital security, plus — it's currently offering 49% off.

